How to Bottom Paint a Boat on a Trailer? – Step by Step Guide by Expert

Most of us love boat rides. It is quite a tempting and extraordinary feel to sail a boat and explore various rivers, lakes, or the sea. But on the other hand, boats require timely maintenance, and you may know that it is not an easy job to do! Although, many of us enjoy working on the boat except the bottom paint on a trailer. It is one of the dirtiest, uncomfortable, and most tiring tasks. But yes, it is compulsory. One or more coats of bottom paint prevent marine growth and protect the boats. Such paints lose their effectiveness after a few months that makes it necessary to paint again.
A fresh coat of paint avoids aquatic life from attaching to the bottom of your boat. Before starting the process, you need to prepare the boat’s bottom by cleaning, sanding, and priming the keel. After that, you just need to apply two to four coats of antifouling paint to the bottom. That’s it. If you follow this routine once a year, you can keep your boat “ready-to-rock” all the time, so, let’s see how to bottom paint a boat on a trailer.
How to Bottom Paint a Boat on a Trailer?
You should have these things in advance to make the process convenient.
- A Paint Tray
- Tray Liners
- Rollers
- Disposable Brushes
- Painting Suit
- Gloves
- Head Sock
- Goggles
- A Respirator (if you are planning to apply a solvent-based paint)
Step by Step Guide to Bottom Paint Boat While On Trailer
Step 1: Choosing a Bottom Paint

There is a wide range of antifouling paints available and choosing the best one for your boat is not always easy. You may have to select a paint according to the climatic conditions or the region. So, it is essential to do some homework and figure out which is the most suitable.
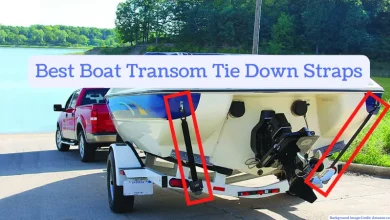
Step 2: Taking Out The Boat

Removing the boat from the water is a bit complicated. It is crucial to paint the boat on land. So, use a trailer hitch attached to the car and get the boat out. If you don’t have anyone who can help you to ease up the boat onto the trailer, you can also hire a marina or boatyard to haul up the boat for you.
Step 3: Cleaning

If the boat’s bottom has been painted before, it is vital to remove any loose and flaking old paint. The new paint won’t last long if you paint it on the old one. To clean such paints, sanding is an effective way. So, sand out the entire surface with 80-grit sandpaper before applying any paint on the bottom.
It is indeed a tiring and tedious process, but you can also take some help from the electric sander, especially for the larger boats. Once the entire surface is sanded, eliminate the layer of dust and wipe the boat’s bottom to clean it thoroughly and prepare it for primer before applying the paint.
If your boat has never been painted before, try to remove the wax sealant. Buy a dewaxing solvent from a marine supply store and dip a clean rag into it. Rub away the wax with that rag and rinse it off using another damp cloth.
Step 4: Applying Primer

Firstly, stir the primer with a paint stick. Prime the edges with a paintbrush and afterward, fill in the middle with the roller. Do an even coat of the primer over the keel. It will take one or two hours to dry. After that process, use fine-grit sandpaper for sanding the primed surface before starting the painting task.
Step 5: Stirring The Antifouling Paint

Take a stick of wood or a paint stirrer and stir the paint at least for 5 minutes. It is essential to have evenly mixed paint. So, if there are any hard chunks on the bottom of the can, break them and keep stirring to make the paint even.
Step 6: Paint Application
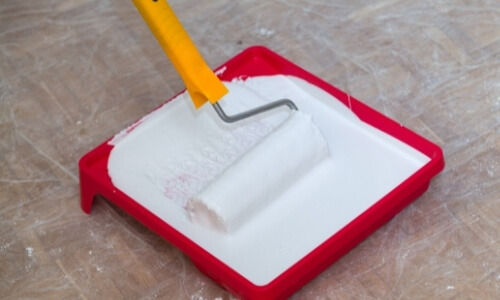
Fill about half of the paint tray with the paint and dip the roller into it. Start with the edges and distribute the paint evenly. Start painting at one end of the keel and move slowly towards the other. You can also use a paintbrush to cover hard-to-reach areas. Don’t paint above the waterline as that particular area requires a different type of paint than the bottom. After applying the first coat, give some time until it is scorched. After that, gently sand down the keel with a fine-grit sandpaper. Now you are all set to apply the second coat.
You should repeat the same process to apply another coat. The second coat can increase the lifespan of the paint job. Some brands recommend having three to four layers in total. If you follow this routine, you must sand the keel after completing each session. After painting, allow the paint to dry for a day!
Step 7: Maintenance

Once you are done with the bottom paint boat on the trailer, it is crucial to clean the keel every 4 to 6 weeks. You should try to wipe away any grime or growth that springs up on your new paint job as soon as possible. Also, such paints work their level best at the time of moving in the water. So, you should ride your boat more to have better effects. If it is not convenient to use it often, try not to have it on the water. Park or store it on land.
Things to Keep in Mind:
- It is vital to wear a dust mask while sanding.
- Never fill or refill the tray without stirring the paint.
- You can also have a different color for the topcoat than the bottom coat. This way, you can always find out when the paint is wearing thin.
This is how you can bottom paint a boat on a trailer. As I have mentioned above, it is essential to reapply the paint once a year using the same paint you have painted before. It is because mixing types of paint can reduce the effectiveness of the biocide. I hope this article has helped you to find the solution you were expecting. Let me know if you have any further questions about bottom painting a boat while on the trailer. Have a nice day! 🙂
Copolymer ablative paints are perfect for boat owners who want a more controlled release of biocides without losing the bottom paint’s antifouling ability. This paint is perfect for those who store their boats during the winter.